
 Think back to a time when your students were working on a worksheet and you could just feel their boredom permeating the room. There’s no shame in this, we’ve all been there at least once. When I say ‘worksheet’ I mean good ol’ pencil and paper, students independently scribing at their desk (or wobbly chair for all my flexible seating friends). Sometimes this is a necessity. There are just some instances when we need to know what our kiddos know, and in the moment the best way is to hand them a worksheet to practice their skills. THERE IS NOTHING WRONG WITH THAT. But, there are a few ways to spice it up when you want to breathe a little more life into the room. And they all start with cutting up your worksheets.
Have a Snowball Fight!
This is a fun and super easy way to get your students excited to practice those skills on a worksheet. I’ve used this with our math curriculum’s chapter review worksheets. They’re long, I’m taking 5-6 pages of math questions of various types, and while I normally let the kiddos work on them together, even that isn’t enough to get them pumped up for this daunting math review. So, I cut them up! I literally cut each question off of the page–be mindful not to print double sided when you do this–and crunched them into paper balls aka, snowballs. I put the snowballs into a plastic bin and handed a couple to each student. I set the ground rules and expectations first, letting them know what was about to happen, providing examples and non-examples (toss the snowballs into a general area, do not peg the person standing next to you… walk to pick up a snowball, do not launch yourself onto the ground… you know, as a teacher we have to spell out every possibility or there will be that one friend saying: “You didn’t say we couldn’t make snow angels!!!”… been there, put a stop to that).
After the expectations are set and are as clear as day, I give them 20 seconds to have a snowball fight. They can toss their snowballs, pick up others and toss some more, but when the timer goes off the snowballs stop. At that point, depending on the number of questions on your worksheet(s) and number of students in your room, they will pick up a set number of snowballs and take them back to their group to work on the problems. They use whiteboards and manipulatives to solve the problems they scooped up,  recording their answers on their own hard copy of the chapter review, or whatever worksheet you’ve chopped up into snowballs. I do this so that they can use the review to study, and so when we go over the review as a whole class they’ll have their copy in front of them. If you don’t want to give each student their own copy of the full sheet(s), have them record their answers in a notebook or just work it out on a whiteboard and erase the answers as they go… this obviously depends on your initial reasoning for having the students complete the work. If a group finishes answering the questions on their snowballs before the rest, they can practice multiplication fact fluency or fill their time with anything you’ve prepared them to do in these down time moments (remember to prepare them to have something to do if they finish early because this would be prime time snow angel time). Once each group is finished, it’s time to crunch up those snowballs and have another snowball fight and we’ll repeat the same procedure as before. This could go on as long as you’d like, trust me, they’ll be fully engaged and not want to stop throwing paper around the room.
It is important to keep in mind, and prep your students to know, that it is extremely likely they will choose the same snowball more than once, and therefore have a couple opportunities to practice the same math problems. So what? Practice makes perfect! Encourage them to try a different way to solve it each time, see what they can come up with! Who knows, maybe the second or third time they work on question #8, it finally clicks for Courtney because Andrea worked it out a different way than how I originally taught it. If you’re not using a math worksheet, have kiddos come up with their own question in place of they one they’ve already answered. Doing a grammar review? Create your own sentence using commas in a series (or whatever the skill is). It’s all about high engagement, collaboration, and getting the kiddos out of their seats. They’re going to love it!
Make a giant game board!
Cut up your worksheets and make a life-sized game board! Cut your worksheets by question or section and tape them to your floor leaving 1-2 feet in between each one. You could also tape the questions to desktops so students can sit in chairs to work out the problems, but its fun for them to feel like gigantic game pieces by moving from place to place on the floor (I had a strict no crawling rule, but your kiddos can move however you want them to). After you’ve taped the sections of the worksheet(s) to the floor, go back through the path you’ve created at add some typical game board posts to throw them off course a bit, and make it more fun! I’ve created a few game board spaces for you to use for free! You could stick a “Back to Start” sign in between a couple questions, or a “Move ahead two spaces” sign, just to spice things up a bit! You should also have a clear beginning and end, so tape a “Start” and “End” sign to indicate the flow of traffic.
A couple things to keep in mind when doing this activity: Your kiddos will likely land on the same question a couple times (see above ideas about how to handle this). Conversely, there will be questions that your kiddos never get to land on. That’s just how a board game works! If every question on your game board is essential to success, give students time to complete any questions they skipped over at the end. This could be done the same way I mentioned before, by making sure each student has a full copy of the worksheet(s) you cut up. This way they can record their answers as they go, and circle back to any questions they didn’t get to during the game.
I recommend modifying the following ground rules and displaying them on your board before getting started:
1. Roll the dice and move that number of spaces.
2. If another team is working on the same question you landed on, skip ahead one space.
3. Keep voices at an indoor level.
4. This is a walking only game. No crawling, running or jumping.
Also, just like the above activity, it’s good to have a plan in place for what students should do if they land on the same question more than once, or if they finish early. The more you can prepare them before the game starts, the fewer times you’ll have to stop them to regroup. This game can continue until every student has made it around the board once or twice, OR you can set a specific time limit for play.
Get them up and moving!
If you’re looking for a super simple solution to get your students up and moving, cut up your worksheet(s) and hang them all around the room. I like to put them in sneaky places where it might be a little more of a challenge to find them. I especially like to do that with the more difficult questions because they’re so excited that they finally found Number Whatever, that their excitement turns into fuel to solve anything Number Whatever throws at them. For this activity, I will have clipboards on hand so kiddos can be mobile while they work. Using one of the above strategies for recording answers, you could either give students a full copy of what you cut up, or have them list the answers in a notebook or on a piece of paper. It all depends on your purpose for having them do the work to begin with. I continue to go back to the math review that I’ve done this for, and I definitely wanted them to have their own copy to use after the game was done. Just by taping the cut up worksheet all around the room, I’ve turned a boring task into an exciting quest.
Shoot some Hoops!
Okay, so this one could be your students’ favorite! I have a small basketball hoop in my 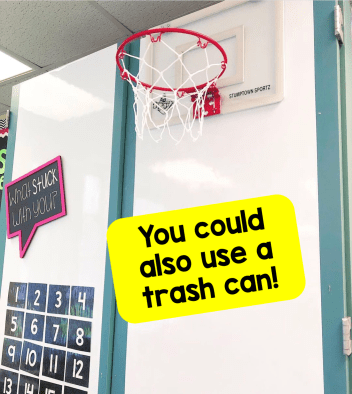 classroom that I purchased from Amazon, but you don’t necessarily need it for this game. You especially don’t need it if you have a trash can in your room! Disclaimer: You’ll probably want the trash can to be clean, or at a minimum, empty.
Following suit, you will first want to cut up a worksheet. This time, I recommend dividing your class into small teams, 2-3 people, and giving each team a set up cut up worksheet(s). This way you know students have access to all of the questions, and the game will last longer than divvying up one worksheet. So, print out a copy for as many groups as you will have, then get to cutting! You can store the cut up worksheets in a Ziploc until you’re ready to play. It’s a good idea to print on different colored paper so you can see which team made the most baskets at the end.
How do you play? First, place the basketball hoop (OR trash can) in a centralized location, as even distanced from each group as possible. Once your class is split into teams, and each team has their cut up worksheet(s) questions, they get to work! They can only work on one question at a time, so they will have to collaborate efficiently. After they all agree on an answer, and you determine it is correct, one student gets to crumple up the question and toss it into the basket (trash can). This process repeats, swapping out students who get to throw, until all questions have been answered or until the time you set runs out. It’s important, again, to have a plan in place for students who finish early. You can choose if you want to keep track of points or not. I can promise you, this will be one they remember and ask to play again. Good thing all it took was some cut up worksheets!
Create your own Jeopardy Game
For this, you will (AGAIN), cut up worksheets by question or section. You will need a whiteboard to display the Jeopardy game. Begin by making a table on your board with categories at the top and increasing point increments going down the columns, just like the Jeopardy board. Then, organize your cut up worksheet into the categories you’ve created. Tape or use a magnet to stick the questions on the board in their appropriate categories and point value. I like to tape them face down so none of my kiddos with “super vision” can get a head start!
Divide your class into small teams. Pick a team to choose the first question by saying “Division for 100” (using your own categories, of course). Flip the card over and read the question to the students. If this won’t work for your group, have full copies of the worksheet(s) at their workspace, and tell them the number of the question they should be working on, example: Division for 100 is question 7b on your Chapter Review. This way, each student can have eyes on the question, and you won’t have to repeat it a million times. Give a set amount of time to solve the question based on level of difficulty. Make that time known to the kiddos, then have them begin working. Each team will display their one answer, and you can choose to allot points for accuracy or make the game just about practicing the skills! Select a new team to choose the next question, and repeat this process until the board is cleared. You can even add a challenge question for Final Jeopardy.
There are many ways to turn a drab worksheet into a fab learning experience that your students will remember. It just takes a little thinking outside of the box. How else do you switch up the norm in your classroom? Drop some ideas in the comments or let me know on Instagram!
Thanks for visiting!
-Courtney
![]()


